Content sharing with Codecrumbs Desktop App
Make sure to read Getting started guide, UI hints and tips first.
Intro
All content (in a form of interactive snapshot or story) can be exported and shared in static format. There is another standalone tool, called Codecrumbs Content Library that can be used to display Codecrumbs content outside Codecrumbs App. You can check example for it running at Content Library section of the website.
Step by step by guide
Request access for Codecrumbs Suite of Desktop Apps
Go to https://codecrumbs.io/pro-access/request, Sign in with your Github account and request access. Trial period is free and takes only few clicks.
Download and install Desktop app
Once you requested access you will be able to download Desktop app (for Mac, Win, or Linux) at the same page. Once it is installed, login into app using the same Github account.
Choose project
Select directory with source code for any of your local projects. In our example we will use todomvc-react-hooks project (cloned locally).
Add annotations
Open files from left side bar or use shortcut
Command + O. Clicking on line number within open file you can create connections ("Start connection" "End connection"), highlight lines, add explanation tooltips, etc. Use (top right corner) or context menu for other operations.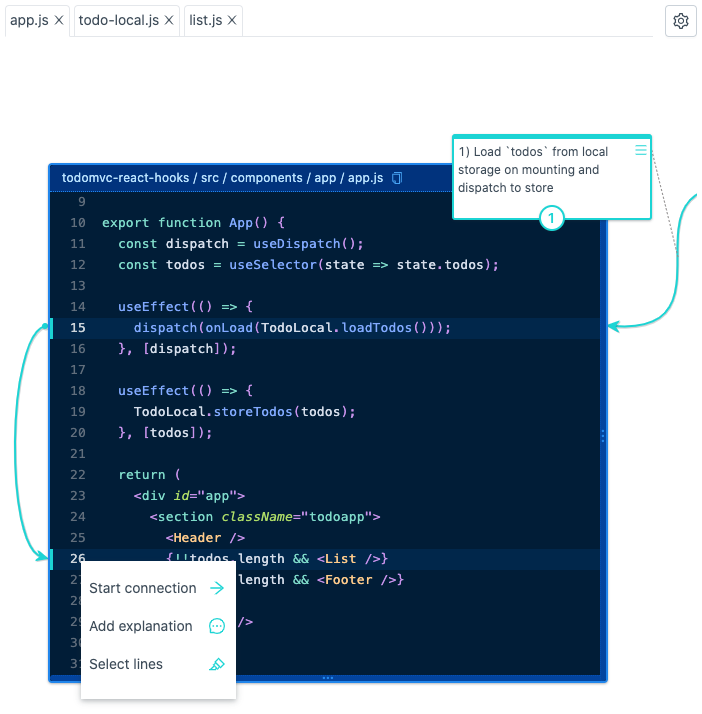
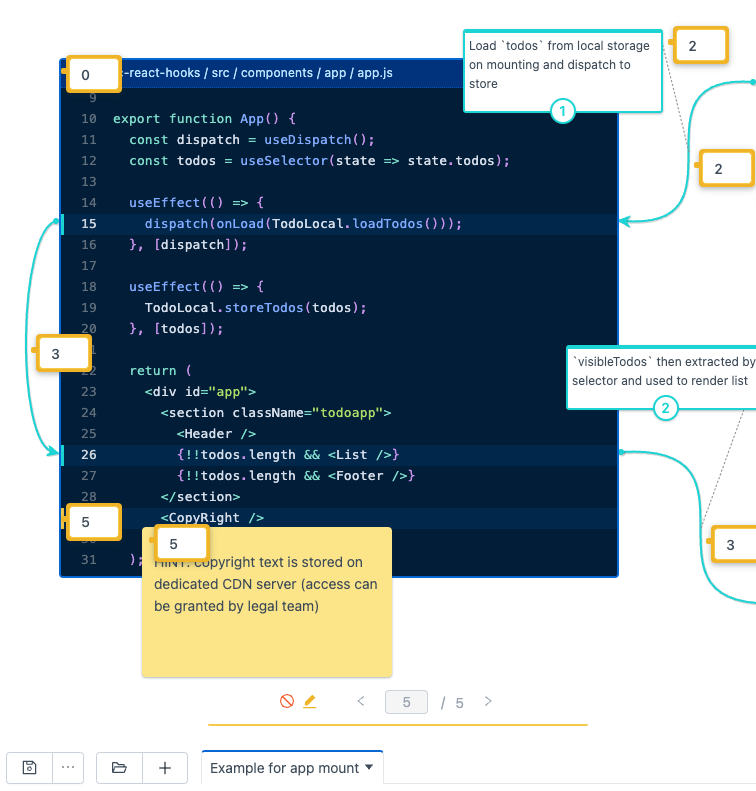
Make an interactive guide
Now you have static scheme, you can make it interactive by progressively rendering flow items in logical order. Enable player mode by going to top-bar menu "Tools" " Player mode". Use player controls for preview. You can then adjust order of appearing for every item on your scheme, enable "Edit mode" for player and fix steps.
Setup your Content library project
Now we need to setup separate project, think about it as a repository for your content (that can be hosted as standalone app). Use
content-library-component(fromcodecrumbs.io/external/js/content-library-component/index.js), which is pre-built standalone app (see below).//index.html<div id="root"></div><script async type="text/javascript" src="https://codecrumbs.io/external/js/content-library-component/index.js"></script><script type="text/javascript">window.onCodecrumbsExternalContentLibraryComponentReady = function(ExternalContentLibraryComponent) {ExternalContentLibraryComponent.load({userContentDir: '.codecrumbs',container: document.getElementById('root')});}</script>Also, you need to create directory where you will export your content. We can name it
.codecrumbs, choose this directory when you export your content from Codecrumbs App next time (it's autogenerated content so normally you wouldn't ever need to check the directory later). See the example of project below.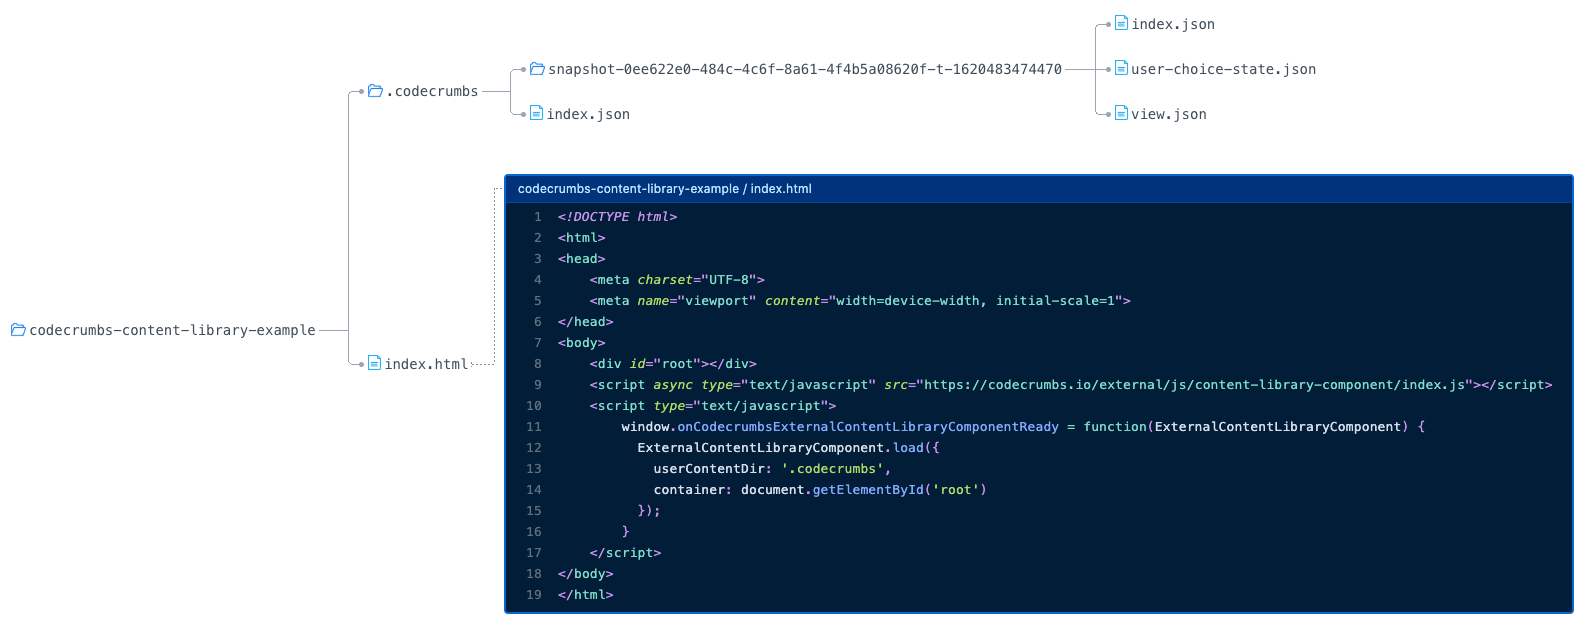
Export snapshot to Content library
Now, you can export snapshot data, going to bottom toolbar ("more" dropdown) "Export settings ... ". In modal popup you can select directory where to export snapshot. Select
.codecrumbsdirectory. Now every time you save the snapshot it will be saved locally at Content Library directory. Commit the changes so rest of your team can see the newly added changes!